Thursday, 12 February 2015

Timbuk2 Sleuth Camera Backpack

I have been looking for a new camera backpack that is airline friendly. The problem I have is that my regional airline only allows quite small cabin bags and I am heading off on an overseas trip soon that allows large bags but only with quite skinny dimensions!!! The last bag I bought for travel does not comply with the current cabin bag limits. As well as my camera gear, I want the backpack to serve as a day pack for hiking.

I looked at many options taking into account the gear I want to take and all were compromises. The best fit (at a reasonable price) was the Timbuk2 Camera Sleuth Backpack. With B & H having the black/grey version on sale, I could pick up the backpack, the optional rain cover and a couple of camera accessories for little more than half the price of the bag from an Australian seller. I thought I would give B & H a go and test out there new low postage rates to Australia.

The Bag
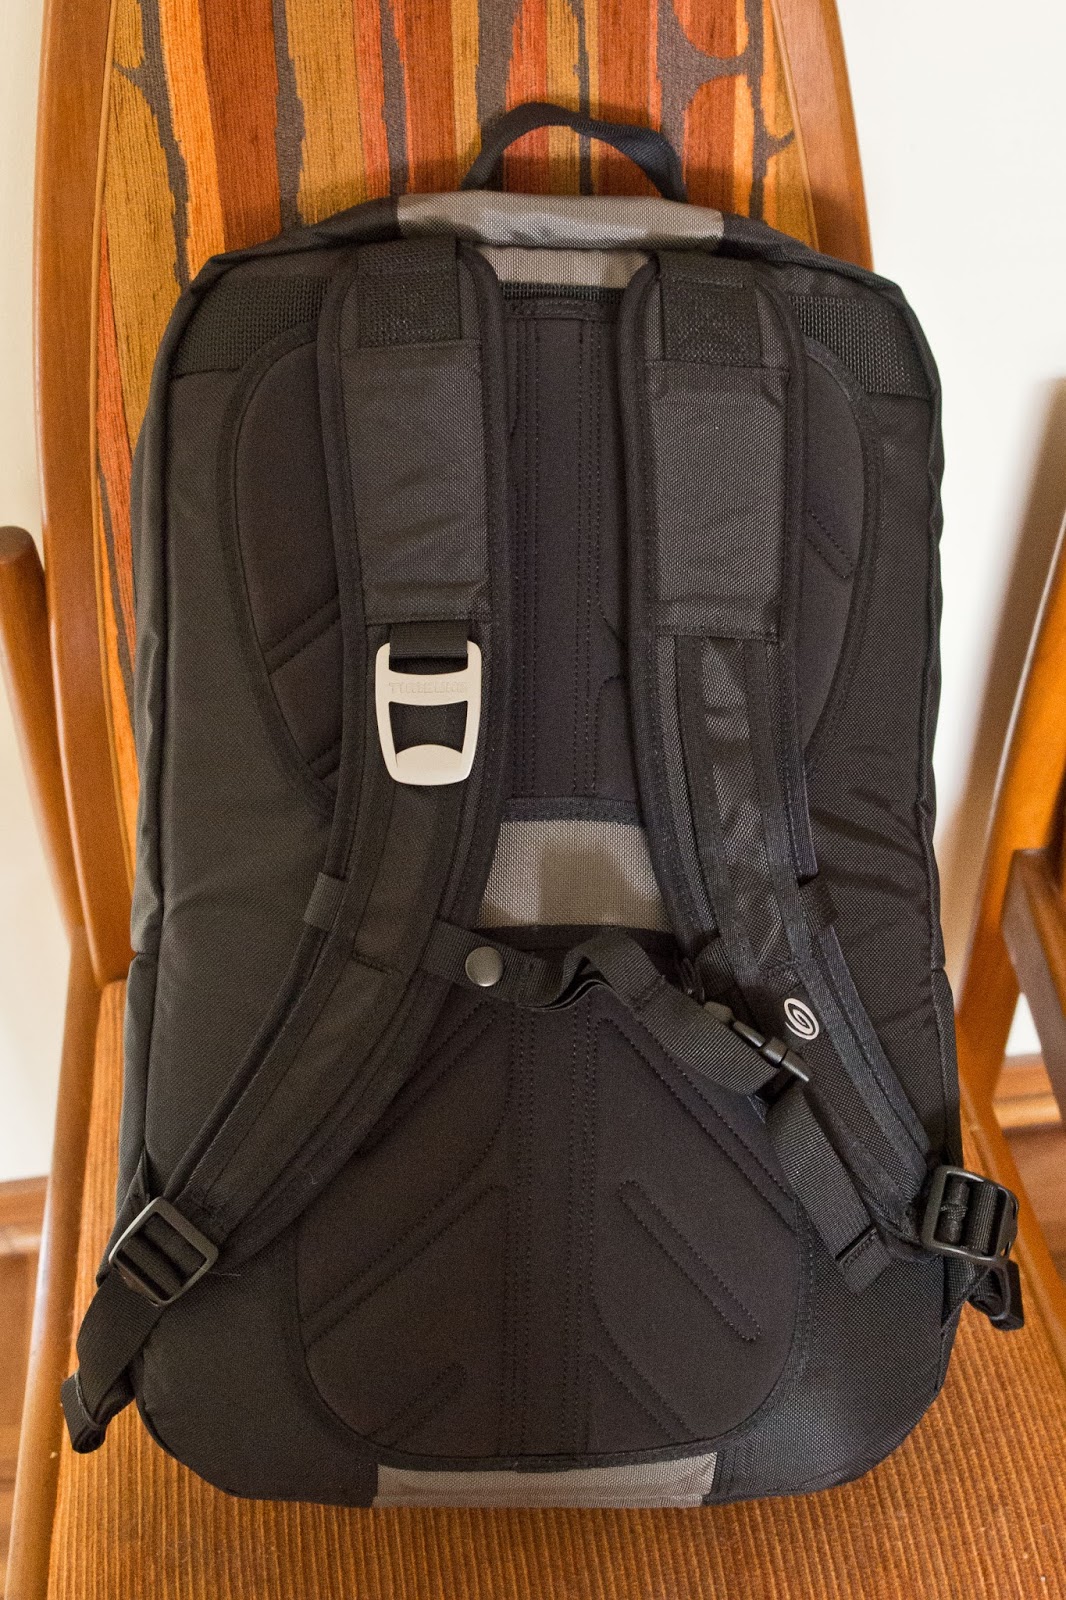
The bag seems very well made and has a quality feel about it. It doesn’t have that “I am a camera bag” look which is a plus.

The outside of the bag is very simple. Two small zippered pockets, provision for holding a tripod, a sternum strap to help keep the shoulder pads in place and other than the zippers for the top and bottom section, that’s about it. Oh, I forgot, a bottle opener that seems to be a Timbuk2 trademark. There is a convenient carry loop at the top and the top section zipper has a flap for rain protection.
 
 
A bit more than half the bag is devoted to the general storage area which is fine for me. There is a dedicated camera sleeve and some storage pockets in the top. Very generous padding ensures everything is well protected.
 
The top section has a waterproof jacket, battery, rain cover (not a standard inclusion of the backpack) and 13.3” laptop in the very well-padded sleeve.
 
 
The bottom camera section has a double zipper that opens to the bottom which means you need to take the backpack off to use. The zipper has a very stiff press-stud to offer some time delay for would be thieves.
The bottom section contains a single z-shaped divider and two small secondary dividers to split up the space. I think there should be one more. In addition, the divider between the top section and camera section can be removed. It is quite secure with Velcro on all sides. The Velcro holds well but the camera section dividers do seem far too thick and too high while the z-shaped divider could be a little longer.

The previous picture shows an Olympus E-P3 with Metabones Speed Booster and Nikon 10-24mm f/3.5-4.5 lens attached (complete with hood), Olympus 60mm f/2.8 macro and SLR Magic 12mm T1.6 lens. Also in there is a Lee filter holder, 3 x 150x100 filters, a Little Stopper and remote control. There is a little bit of free space but the dividers make it difficult to optimise the use. It is quite difficult to use the space well when you have a reasonably long lens combination, e.g. the Olympus OM-D E-M5 and 40-150mm f/2.8 Pro lens combination.

 
The backpack itself is reasonably comfortable without the laptop but as with most backpacks that place the laptop against your back, less so when the laptop is included. The straps could have a bit more padding and I find the sternum strap, while adjustable, isn’t ideally placed. The back has foam padding but as it lacks mesh, I would expect it not to be ideal for long hikes in summer.

Pros
The bag is well made and offers heaps of protection. It is also small aircraft cabin friendly. Great value for money. This would also make a really great urban walkabout bag.

Cons
The excellent padding and so-so partition design makes it hard to optimise the space in the camera section and as a consequence of the extra padding, a little heavy for its size. There are no drinks pockets and the tripod storage means you cannot use the small external pockets when you have a tripod attached. Rain cover is an expensive option.

Conclusion
Good value for money and quite suitable for a walk around town or taking gear on aircraft. Not ideal for hiking or if you have bulky gear.

Monday, 2 February 2015

ASUS Zenbook UX303LN Laptop Review

The Introduction

Welcome to my review of the Asus Zenbook UX303LN. This review covers the i7 version with 256 gb SSD, 8 gb of memory and FHD touch screen.

Digital photography has two main elements, the first of course is capturing the image which of course is the foundation of what you are doing. The second skill is the processing of the image and that requires a computer with a decent screen.

I changed from desktop machines to laptops quite a few years ago as I can take the laptop with me when I travel. My last laptop was a Toshiba P840 which was becoming quite frustrating to use. Crap keyboard and terrible screen. It worked OK if you plugged in a separate keyboard and external monitor but that defeated the versatility of being a laptop.

What to buy? Well I took several months to decide, looking at all the compromises - do I go to a larger 15.6" screen (the old one was 14") or head down to 13" screen. I knew I wanted more resolution and an IPS screen. But with travel a key component, 13.3" screens seemed a good choice and a 1920 x 1080 FHD screen seemed to be the sweet spot.

I also knew 8gb of memory would be fine and a SSD drive highly desirable to overcome slow start up times. Lighter was better, but I knew I could also use a separate graphics module to help speed up screen rendering of images (and also ensure all of that 8gb of memory was available for processing).

There were several machines that quite interested me, especially those from Lenovo which also have fantastic keyboards and are usually fairly easy to upgrade. The problem was the cost after you optioned up the machines with the right amount of RAM, a decent processor and other bits.

I started to see periodic sales of the ASUS UX303LN so checked it out. In the i7 version, it had enough RAM, a good screen and a 256gb SSD which was just adequate for purposes provided a lovely FHD screen into the bargain. I saw one for a good price from The Good Guys and ordered it to be delivered as the closet store was 200km away. Strangely, rather than assigning the order to closest store, it was assigned to one about 4000 km away. To say the service from the Good Guys was "good" would be far too generous. It was quite appalling and took 12 days for the computer to go from the back to the store to the front of the store for collection by the courier. The courier (StarTack Express) was stunning. Picking up the computer around 4:30 PM on the last Friday before Christmas and delivering it at 9:30 AM on the Monday morning. Not bad for a 3500 km air trip and then another 420 km by vehicle.

Now the Computer Review

The first thing that impresses is the packaging. While it comes in an ordinary looking cardboard outer box for shipping, inside is a glorious looking shrink wrapped box that looks so appealing. This looks something special.

 
Next, peel off the shrink wrapping and raise the lid. Beautifully presented, neatly laid out and no wasted space.


Take all the goodies out of the box and it still impresses.


Take all the goodies out of the box and it still impresses. You get a brown fabric and fake leather computer sleeve, tiny power supply, dongles for USB to Ethernet adaptor and mini-DisplayPort to VGA and a cable strap (which is in addition to the ones on the cables). You also get the couple of sheets of paper (warranty, warnings and a pamphlet to get you going).
 
Inspection of the machine reveals are pretty neat looking device in its aluminium/pseudo aluminium casing. 
 
The screen lid has a lovely brown-toned surface and the touch screen has gorilla glass or similar hard plastic that extends to the edges. No flimsy bezel to crack like an earlier ASUS laptop I have in the cupboard.
 
The screen hinge seems quite good - the movement of the screen fairly light but enough to be stable when open.
 
The base is made of a casting. It looks like aluminium but doesn't feel cold to touch. While it could be some sort of alloy, doesn't get really cold to touch. It is very rigid and looks great. The bottom appears to be a sheet of anodised aluminium.
 
Plug her in, charge it up and away we go. First start up is the normal Windows 8.1 and fairly easy and nowhere near as annoying as it use to be. It all fits rather well although not quite like the hewn out of rock build of say a MacBook Pro - but pretty close.
 
On the left you get two USB3 ports and a card reader. Cards stick out quite a way when inserted. On the right you get a mini-DisplayPort, single USB3, HDMI port and headphone/audio port. On this side is also the power input.
 
The keyboard has quite nice keys. Not quite up to the standard of say a Lenovo keyboard but well spaced and with adequate travel. You can type at a moderate speed and be fairly accurate with this keyboard and it has variable backlighting which makes it great for working at night with minimal lighting. The only minor dislikes are the lack of dedicated keys for pgup, pgdn, home and end. These are shared with the scroll keys and require the fn button to activate. The power button looks like a normal key in the top-right corner of the keyboard but this hasn't caused any problems so far.
 
The track pad seems OK, very large and reasonably sensitive. Some reviews I have read claim the track pad surface is glass but it certainly is not. It has a similar look and texture to the laptop keyboard surround but is a separate element. I don't like track pads and normally use a wireless mouse so not much else to say about it.
 
The screen. It's stunning. Compare new and old side by side.
 

The tonal range is brilliant. The old Toshiba on the right is totally outclassed. The first job as usual is to calibrate the screen with my Spyder4Pro. Uncalibrated, the screen was 98% of sRGB, after calibration, it was also 98% of sRGB. There was a change after calibration but is was so minor, the screen could have been left as it was. Note, the screen also achieves a stunning 76% of the full AdobeRGB palette. As with any IPS screen, the viewing angles are magnificent. That's better than a MacBook Pro Retina 13!!!
 
While having a touch screen also results in a glossy surface, it isn't quite as glossy as the old Toshiba and the brightness is in another league and it is quite visible when viewed in shade outdoors and you can still manage (just) with full sun.
 
After installing the software, I was rather disappointed with the performance of Photoshop CS5 until I realised the machine did not automatically apply graphics acceleration to CS5. This may have been due to the older version of the software but a quick tweak of the graphics engine to force it to use the dedicated Nvidia Geforce 840M processor soon fixed that.
 
I must admit the processing improvement isn't huge compared to my old i5 processor. That old processor had clock speeds of 1.8 GHz and 2.7 GHz turbo while the new processor 2.0 GHz and 3.1 GHz turbo (but only 2.8 GHz with both cores driven). There is an improvement, but it isn't spectacular.
 
Likewise, the move forward from the Nvidia Geforce GT 630M to the newer Nvidia Geforce 840M is not sensational either. Still, every bit counts.
 
What else - oh, that SSD is brilliant. I would never have a normal hard disk as a main drive. There is no going back. One thing I like about the ASUS is that it is upgradable (after removing something like 13 teeny screws from the base). I can upgrade the memory to 12 gb and the SSD can be swapped out for a larger one and there is even a free mSATA half-sized slot that can take another drive. Half-sided SSDs are currently available to 128 gb but I expect that may grow.
 
Overall, a very nice machine. Very light and compact, well built, some upgrade potential, a stunning screen for photo editing, adequate performance for Photoshop CS5 and other photo editing software and reasonably priced for a light 13.3" laptop. 

Sunday, 18 January 2015

Olympus 40-150mm f/2.8 - more photos

This selection of photos was taken at the Candelo show today using the Olympus 40-150mm f/2.8. These photos are generally at the 150mm end of the zoom and at f/2.8. They show great detail for a zoom lens wide open at the extreme end of its zoom.


Saturday, 17 January 2015

Olympus 40-150mm f/2.8 Review

I bought the Olympus 40-150mm f/2.8 mainly due to my interest with photographing musicians and they tend to play indoors from time to time. That test will have to wait, but here is my first impressions review.

The first thing that impresses about the Olympus 40-150mm when first come across it is the size of the box. Is this really a Micro Four Thirds lens or is it full frame. That’s one big box for a zoom lens that only extends to 150mm.

Unboxing, the lens is far smaller as it only occupies the bottom part of its huge container. There is some empty cardboard which is presumably for the optional tele-converter, the lens hood and a rather thick and substantial bag for the lens. The lens itself wrapped in plastic with the sliding hood reversed and over the outside of the lens.

On the camera, the lens doesn’t look nearly so large unless you extend the generous hood.

 
The feel is superb. It looks quality and feels quality with a combination of metal and top-grade plastics. The fat zoom ring and the focus ring feel very nice. The usual snap manual focus a joy to use.


The lens hood is very clever and so simple, a little twist of the ring and pull it back when not in use makes the 40-150 relatively compact (but stubby) when not in use. You never have to take it off.


The tripod collar is just the right size and is very sturdy. It can be removed if you need for total hand-held shooting and while the foot of the collar is small, it seems very sturdy when mounted. I use Arca-Swiss style quick release plates and while the 60mm plate I use most frequently seems a little large, I can flip up the front anti-rotation tabs when using on the collar – very nice.

Handling is really good when coupled to the Olympus OM-D E-M5. This lens is never too big and works fine hand-held or on a tripod.
 

The photos produced by this lens are very sharp, even at f/2.8 and always very good contrast. The focus is reliable and focus speed adequate in good light and gets there without hunting in poor light. Streets ahead compared to my previous telephoto zoom, the Panasonic 45-200mm which is neither very sharp and a dog to focus on Olympus cameras.


Well, is the Olympus 40-150mm f/2.8 perfect? No. I do have a couple minor disappointments. Focus speed is not stellar in good light. I was expecting something closer to the speed of the 12-40mm zoom; however, it is quite adequate for purpose. A focus limit switch would have been nice and would speed things up with normal use. Another issue also concerns focus but in this instance the manual focus and the excessive amount of travel beyond the infinity mark before it reaches the hard stop. I really think Olympus could be a bit more precise here.
Overall, a fabulous lens and worth every cent.

Monday, 26 May 2014

The camera you take when not taking a camera - Review of the Sony DSC-HX50V

There are many times that I have been strolling/bush walking or out for a short drive when I have wanted to take a photo and all I have is my camera phone which basically sucks in most situations. Maybe you want to go on holiday and travel very light.

I have had simple point and shoot cameras in the past and thought it may be time to re-visit one as a pocket camera for times like above. My partner, Chris isn't one to twiddle with settings to get the best photo and we are often out where she wants to take a snap. While Chris tends to spend large sums of the latest mobile phone, some of which have half-decent cameras, they often come up wanting in anything remotely challenging.

I bit the bullet and was about to buy a Samsung WB350. Not the greatest of cameras but just right for Chris and acceptable photo quality for sharing. The WiFi functionality was a big drawing point for Chris. The price was great as there was a sale on but now living outside a large metropolis, by the time Chris got to the store, the sale was over and the camera had gone up in price from around $249 to $299 (everything is more expensive in Australia). For just a couple of dollars more, it was possible to do much better. I had seen the Sony DSC-HX50V for sale for $349. While it had been superseded, the reviews were good and it seemed like much better value. According to Internet, my local electronics store had the newer version for sale at $449 but that was getting a bit much (and quite often they need to order in stuff). What a surprise when I popped in and saw the Sony DSC-HX50V for $349. A little bit of haggling and it was mine for $329 or just $30 more than the Samsung.

The camera is small, amazingly small for a camera with a 30x zoom lens. Frankly, if the body was any smaller, it would be cramped. Build quality is solid and controls are well placed. It even has an external flash shoe of a Sony design for their fancy (overpriced) accessories that will take a standard ISO shoe flash. Tried it out with my Olympus FL14 flash on the "auto" setting and it works fine after a little experimentation with settings (and greatly extends the flash range).

About the only comment regarding the build quality would be the battery door which is a little too easy to open accidentally.


Taking pictures - I trialled the camera on the "Superior Auto" mode as this is what Chris would most likely be using and the results are impressive. Best to look at the results. All shots are hand-held, the camera has chosen all settings and none have been overridden, some night shots have ISO boosted to 12800 and have come out surprisingly well. Maybe not for printing wall sized posters but ideal for social media, general viewing online and printing small prints. Images shot in better light where ISO is kept to ISO 800 are excellent. A big improvement over a mobile phone and certainly better than any of the compact cameras I have had in the past.


Credit - the last 3 photos were taken by Chris.

Saturday, 13 July 2013

Metabones Nikon to Micro Four Thirds Speed Booster Review

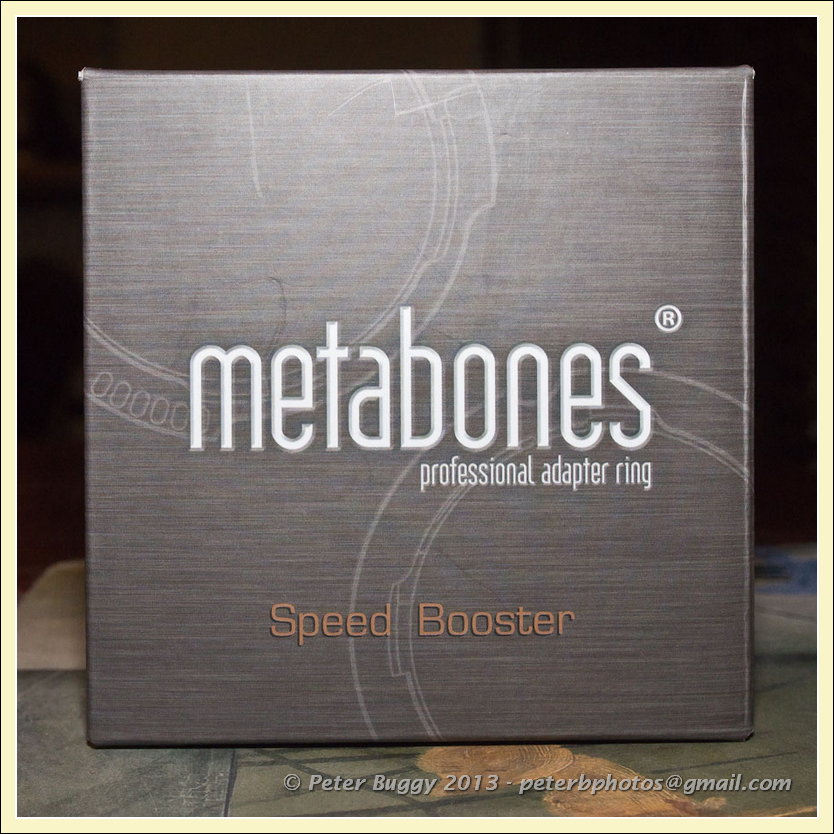
I have been waiting for the Nikon to Micro Four Thirds Speed Booster from Metabones for a little while now. It was announced back in January and now, 6 months later the Nikon to MFT version has hit the scene. Within a couple day or two of the announcement, I checked my bank balance and placed my order. Around 3 days later, a little parcel arrives at my work desk in Sydney all the way from Hong Kong. I have to say I am impressed at how quickly it got to me.


The build quality is very good. The body is metal; the aperture control has engraved markings and is indented for half-stops. The 4-element lens unit is a solid looking piece and it all seems to be put together well.

What's in the box?


The Speed Booster comes well packed but there is no pouch to store the adapter in. It comes with front and rear caps. One being their version of Nikon body cap, the other being their version of a Panasonic rear lens cap. Unlike the body of the Speed Booster, neither are well made but do work.  I tried using a Nikon body cap but the fit is too loose.

Also in the box, you get a couple of hex keys in a plastic bag to remove the tripod adapter. There are no instructions or guide on how to use the unit.

The elements of the Speed Booster are a little exposed at the MFT end and I wouldn't recommend using an Olympus cap - it seems as though it would be very close to the lens element. The Panasonic style cap would be a better choice and get over the slight nastiness of the supplied cap.

Putting Camera, Speed Booster and Lens Together

Attaching the Speed Booster is fairly easy. While it doesn't mount as smoothly as say an Olympus lens on my OM-D and likewise, Nikon lenses feel that great when rotating them, I have had worse. This was a little surprising considering the apparent high build quality. On the Metabones web site it says to rotate the Speed Booster ring to 8 before mounting the lens. I don't think failing to do so would damage your lens or the Speed Booster, but it may make it more difficult to lock the lens should you not when the aperture tab on the lens is pushed up against the Metabones aperture control link.


There is a compact tripod mount on the unit and this is threaded for a quick release plate, or you can use it directly in a Arca Swiss style tripod clamp. It looks very short for the latter but works well for any lens that does not have its own tripod clamping ring and gives good balance with a standard zoom and with the relatively light weight of MFT cameras, just right for these lenses. Obviously, if using something like a Sigma 150-500mm zoom you would use the lenses tripod mounting ring.

Well how does it work?

Well I must say I am pleasantly surprised. In a word - excellent!!!! I was expecting the sort of degradation you get when you when you use a teleconverter. It seems excellent from fully open with the lenses I have used.

So far I have had a play with an ancient Nikon AF Nikkor 24mm f/2.8. This is a pre-D lens and not one of Nikon's best. When mounted, it becomes a 35mm equivalent at f/2. This lens suffers from flare and it seems no worse for the Speed Booster despite adding 4 lens elements into the equation. As a full-frame lens, there is no light fall-off and sharpness does not suffer. Not an excessively large combination and easy enough to use. I wouldn't say it is a substitute for something like the Olympus 17mm f/1.8 which remains on my wish list.

Next play was with the Tamron 60mm f/2 macro. This is a DX format lens and it becomes the equivalent of an 85mm f/1.4 (sort of). I don't consider this lens a true f/2 as it is only f/2 at around 3m and longer. As an internal focusing macro lens, the focal length increases the closer you focus and the aperture falls. It is around a f/2.5 at closest focus. Still, the extra speed makes a nice bright viewfinder and the generous focus ring rotation of the lens makes it easy to focus. The Tamron 60mm is ultra-sharp on my Nikon and just as sharp on the Olympus.

OK, now for the real test. My Nikon 10-24mm f/3.5-4.5 zoom is probably my most used Nikon lens. With the Speed Booster on my Olympus OM-D this becomes an equivalent to a 14.2-34mm f/2.5-3.2. This is a lot faster (1 2/3 stops) than my Olympus 9-18mm (18-36mm equivalent) f/4-5.6 zoom goes substantially wider and almost as long. First impressions indoors I noticed quite a bit of vignetting. In the field, this does not seem to be an issue, probably due to the longer focus distance slightly increasing the focal length - who knows. It gives a fair bit more in field of view than the Olympus wide zoom and again very sharp. One disadvantage of the 10-24mm lens is the relatively short focus scale but the wider focal length afforded by the Speed Booster seems to overcome any issues here and the 14x screen magnification available for the Olympus OM-D makes focusing not ultra-critical.

The results show in the photos.
  

Tamron 60mm macro - a tiny flower at closet focus and stopped down quite a bit.


Nikon Nikkor 10-24mm f/3.5-4.5 at 24mm


From the same spot - Nikon Nikkor 10-24mm f/3.5-4.5 at 10mm


Nikon Nikkor 10-24mm f/3.5-4.5 at around 18mm


 Conclusion


The Speed Booster is not cheap and costs about the same as a mid-priced consumer level fixed focal length lens or one of the cheaper non-kit zooms. If you have a couple of lenses sitting in your kit bag for a Nikon camera, it can be a bargain. There seems to be no real image quality issues with using the Speed Booster and for low-light work - a real treat. With DX lenses and the 0.71x magnification of the Speed Booster, you have a lot more wide options for the Olympus system.

Friday, 5 April 2013

SLR Magic Hyperprime 12mm Cine T1.6 Lens Review


OK, let's start off the review of a series of long-exposure, low light photos taken with the SLR Magic Hyperprime 12mm Cine T1.6

This series of sunrise photos taken at Cronulla this morning with the SLR Magic Hyperprime 12mm using my Olympus OM-D E-M5.

#1

#2


#3


#4

#5

About the only area where you could criticise the performance of this lens is shooting into the sun or a bright source of light where lens flare and internal reflections are a problem. That said - it is no worse than a complex zoom lens, say for example the Olympus 12-50mm zoom. Vignetting is also high but easy to fix in post processing. Fringing is about average and distortion fairly low.

Build quality is excellent. The focus ring is firm and while well damped, not as smooth as say a Voigtlander focus ring and there is a tiny little bit of play in it when you change direction. Still well above average in and vastly superiour to the manual focus rings you get on AF lenses. There are a few exposed but recessed screw heads and the lens mount is not separate, i.e. it is integrated into the housing.

The lens feels very heavy when not mounted on a camera but is nicely balanced on the Olympus OM-D E-M5.

The optional lens hood step-up ring is a rip off. It it little more than a slightly dished step-up ring and is certainly not optimised for the angle of view of the lens. I think a much cheaper 58mm to 77mm stepping ring would be fine along with a 58mm wide angle lens hood (probably a bit difficult to source a 77mm one that is not a bayonet fitting).

Overall, this is a great little lens. Works well in early morning landscape and seascape photography. Good value for money if you don't need auto focus.